Steps
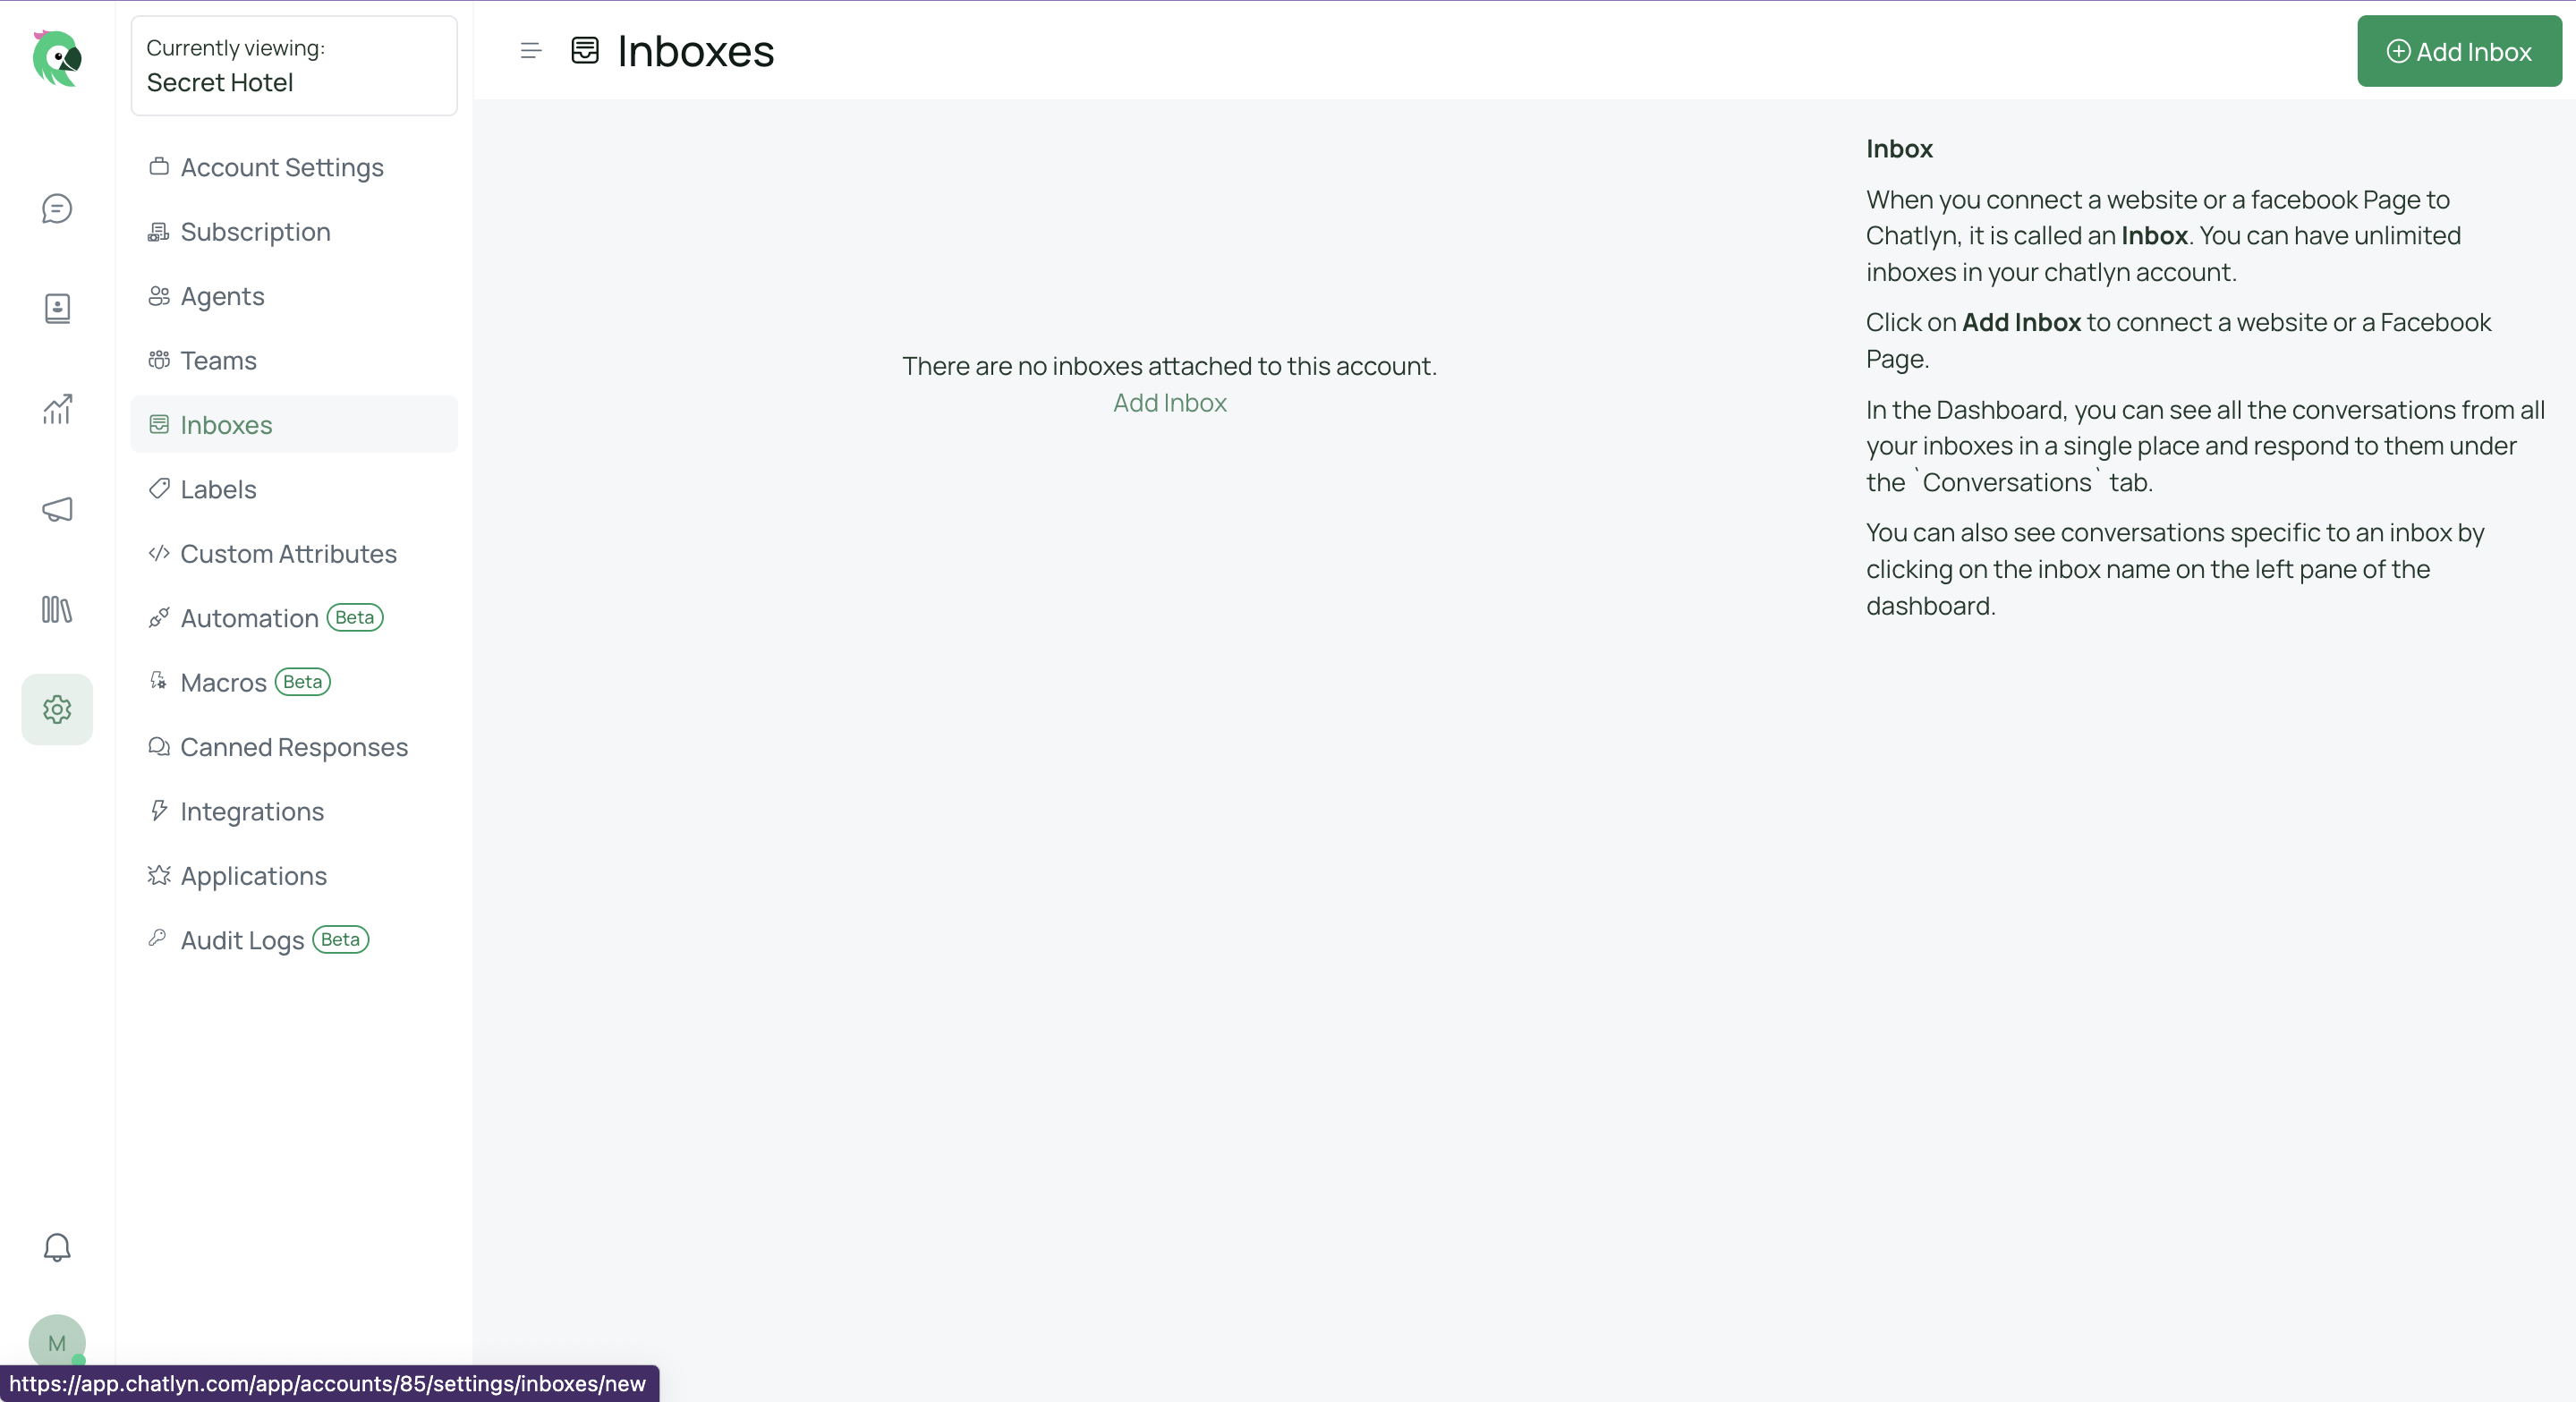
Open your chatlyn dashboard and navigate to Settings > Inboxes > Add Inbox.
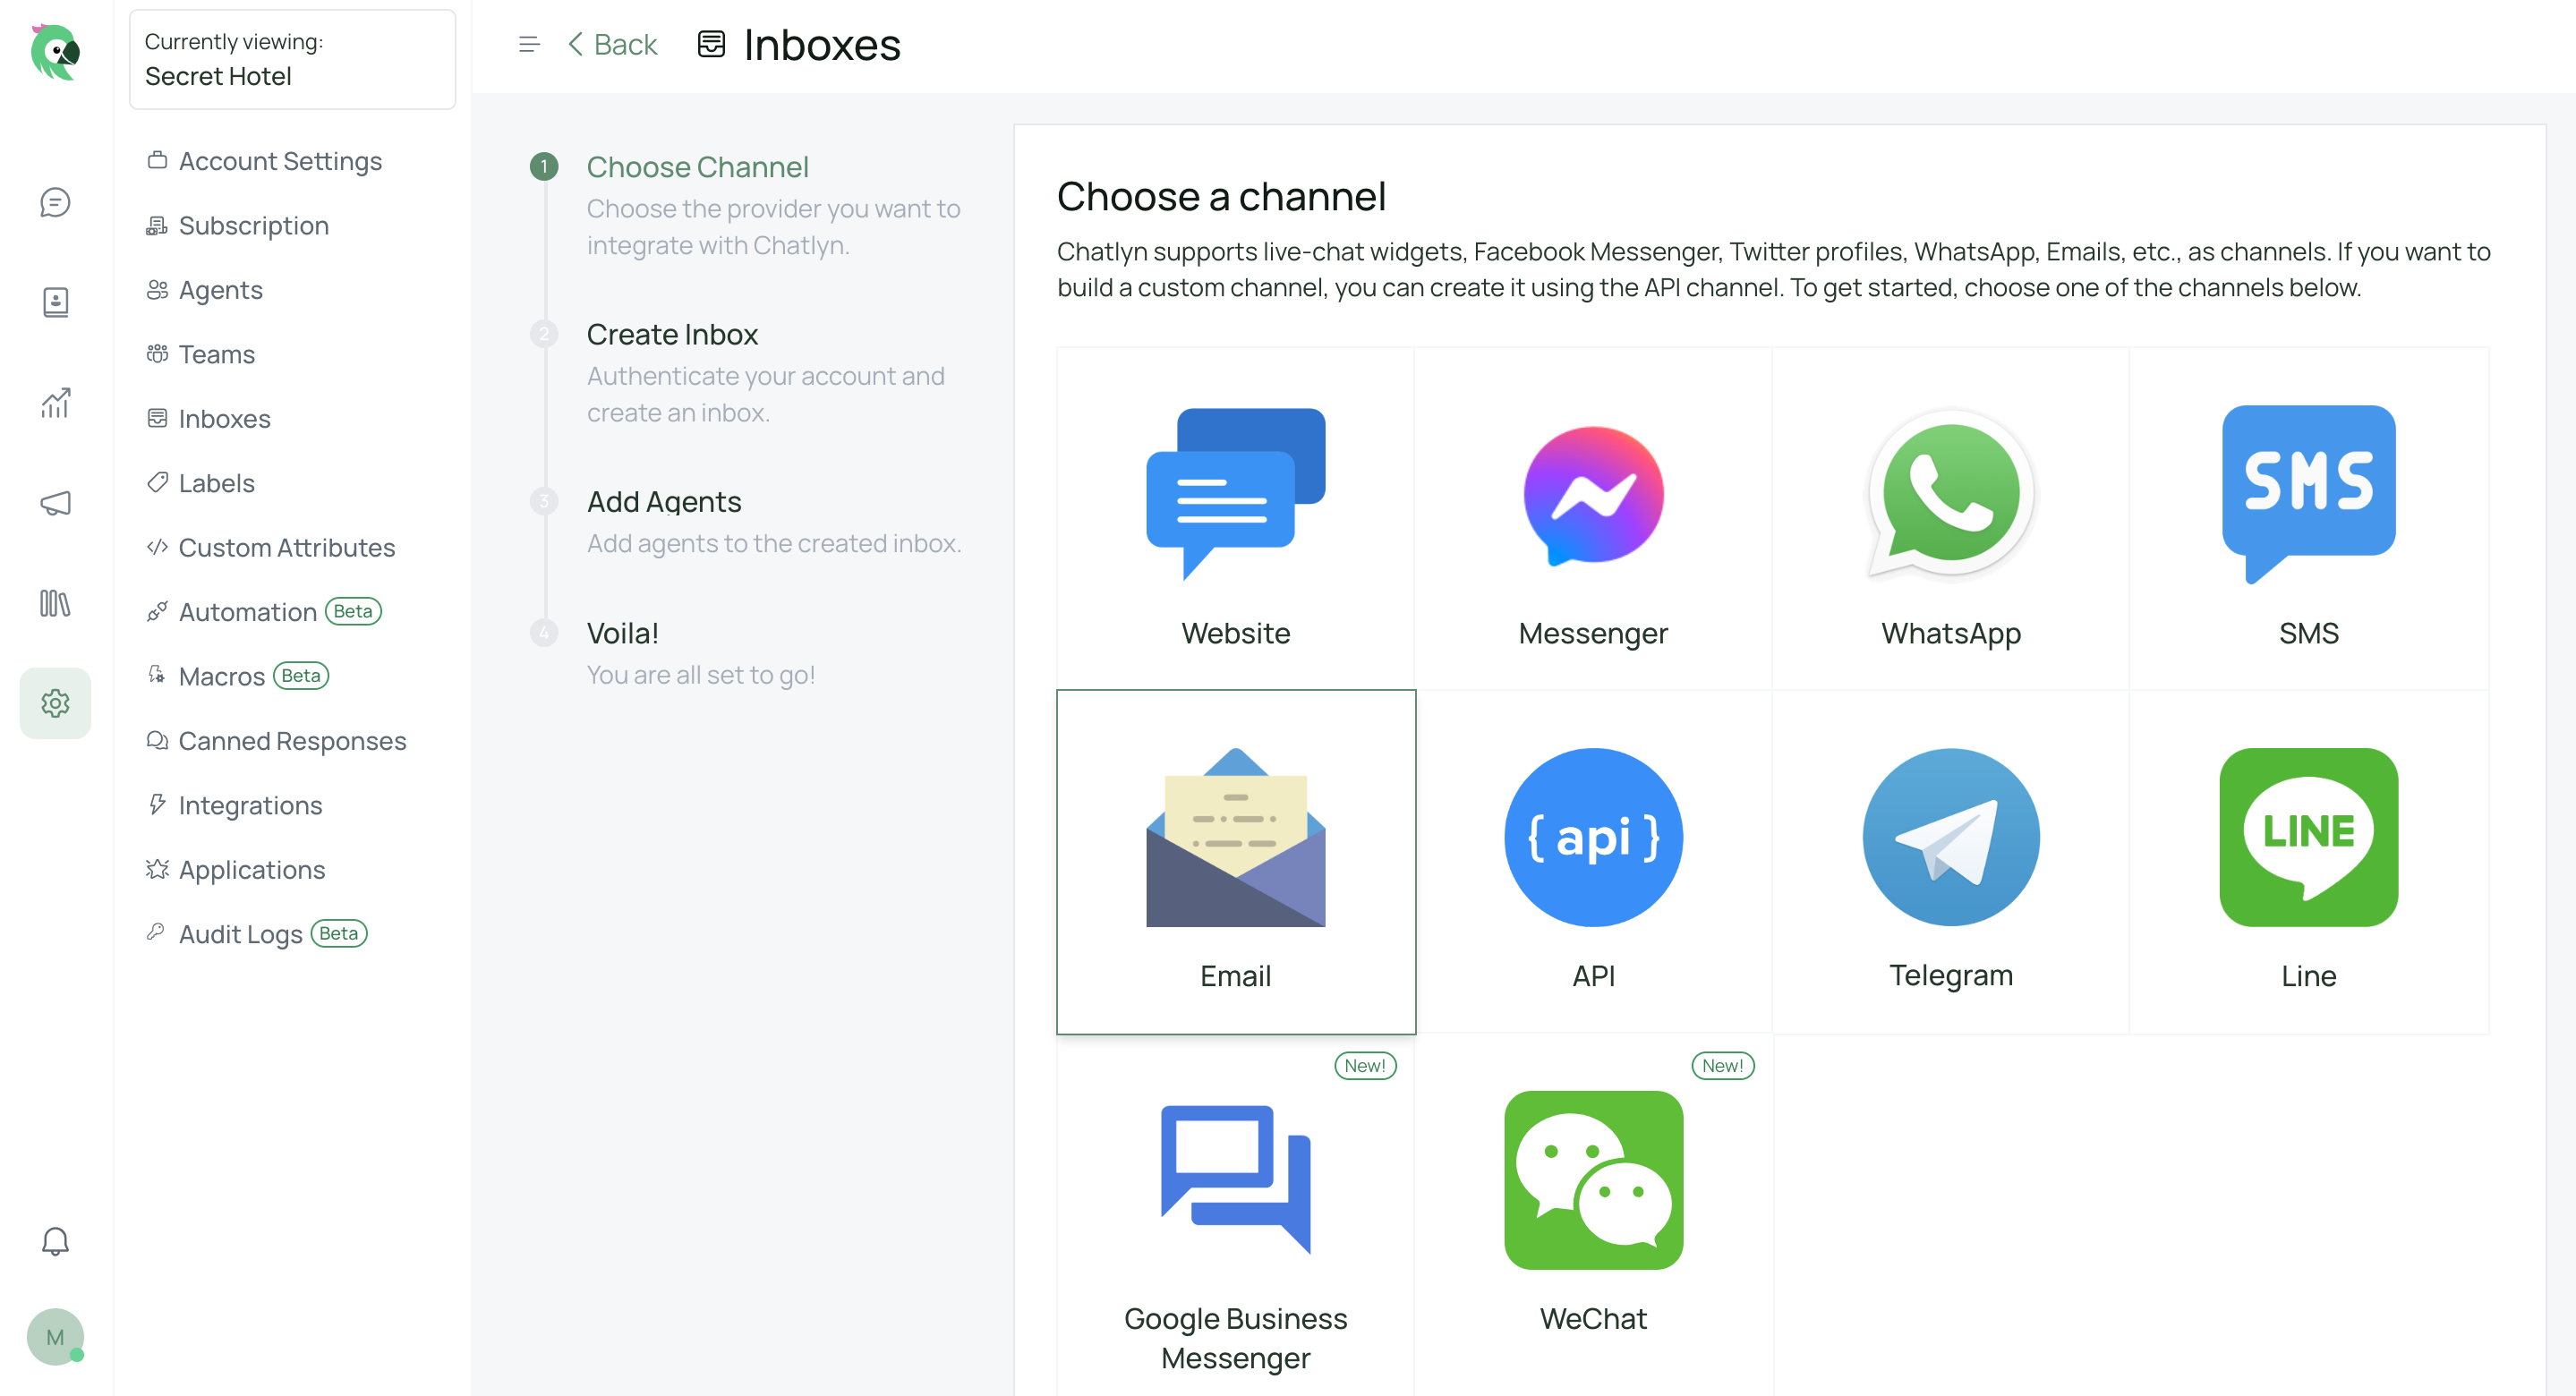
Click on the “Email” icon from the list of channels.
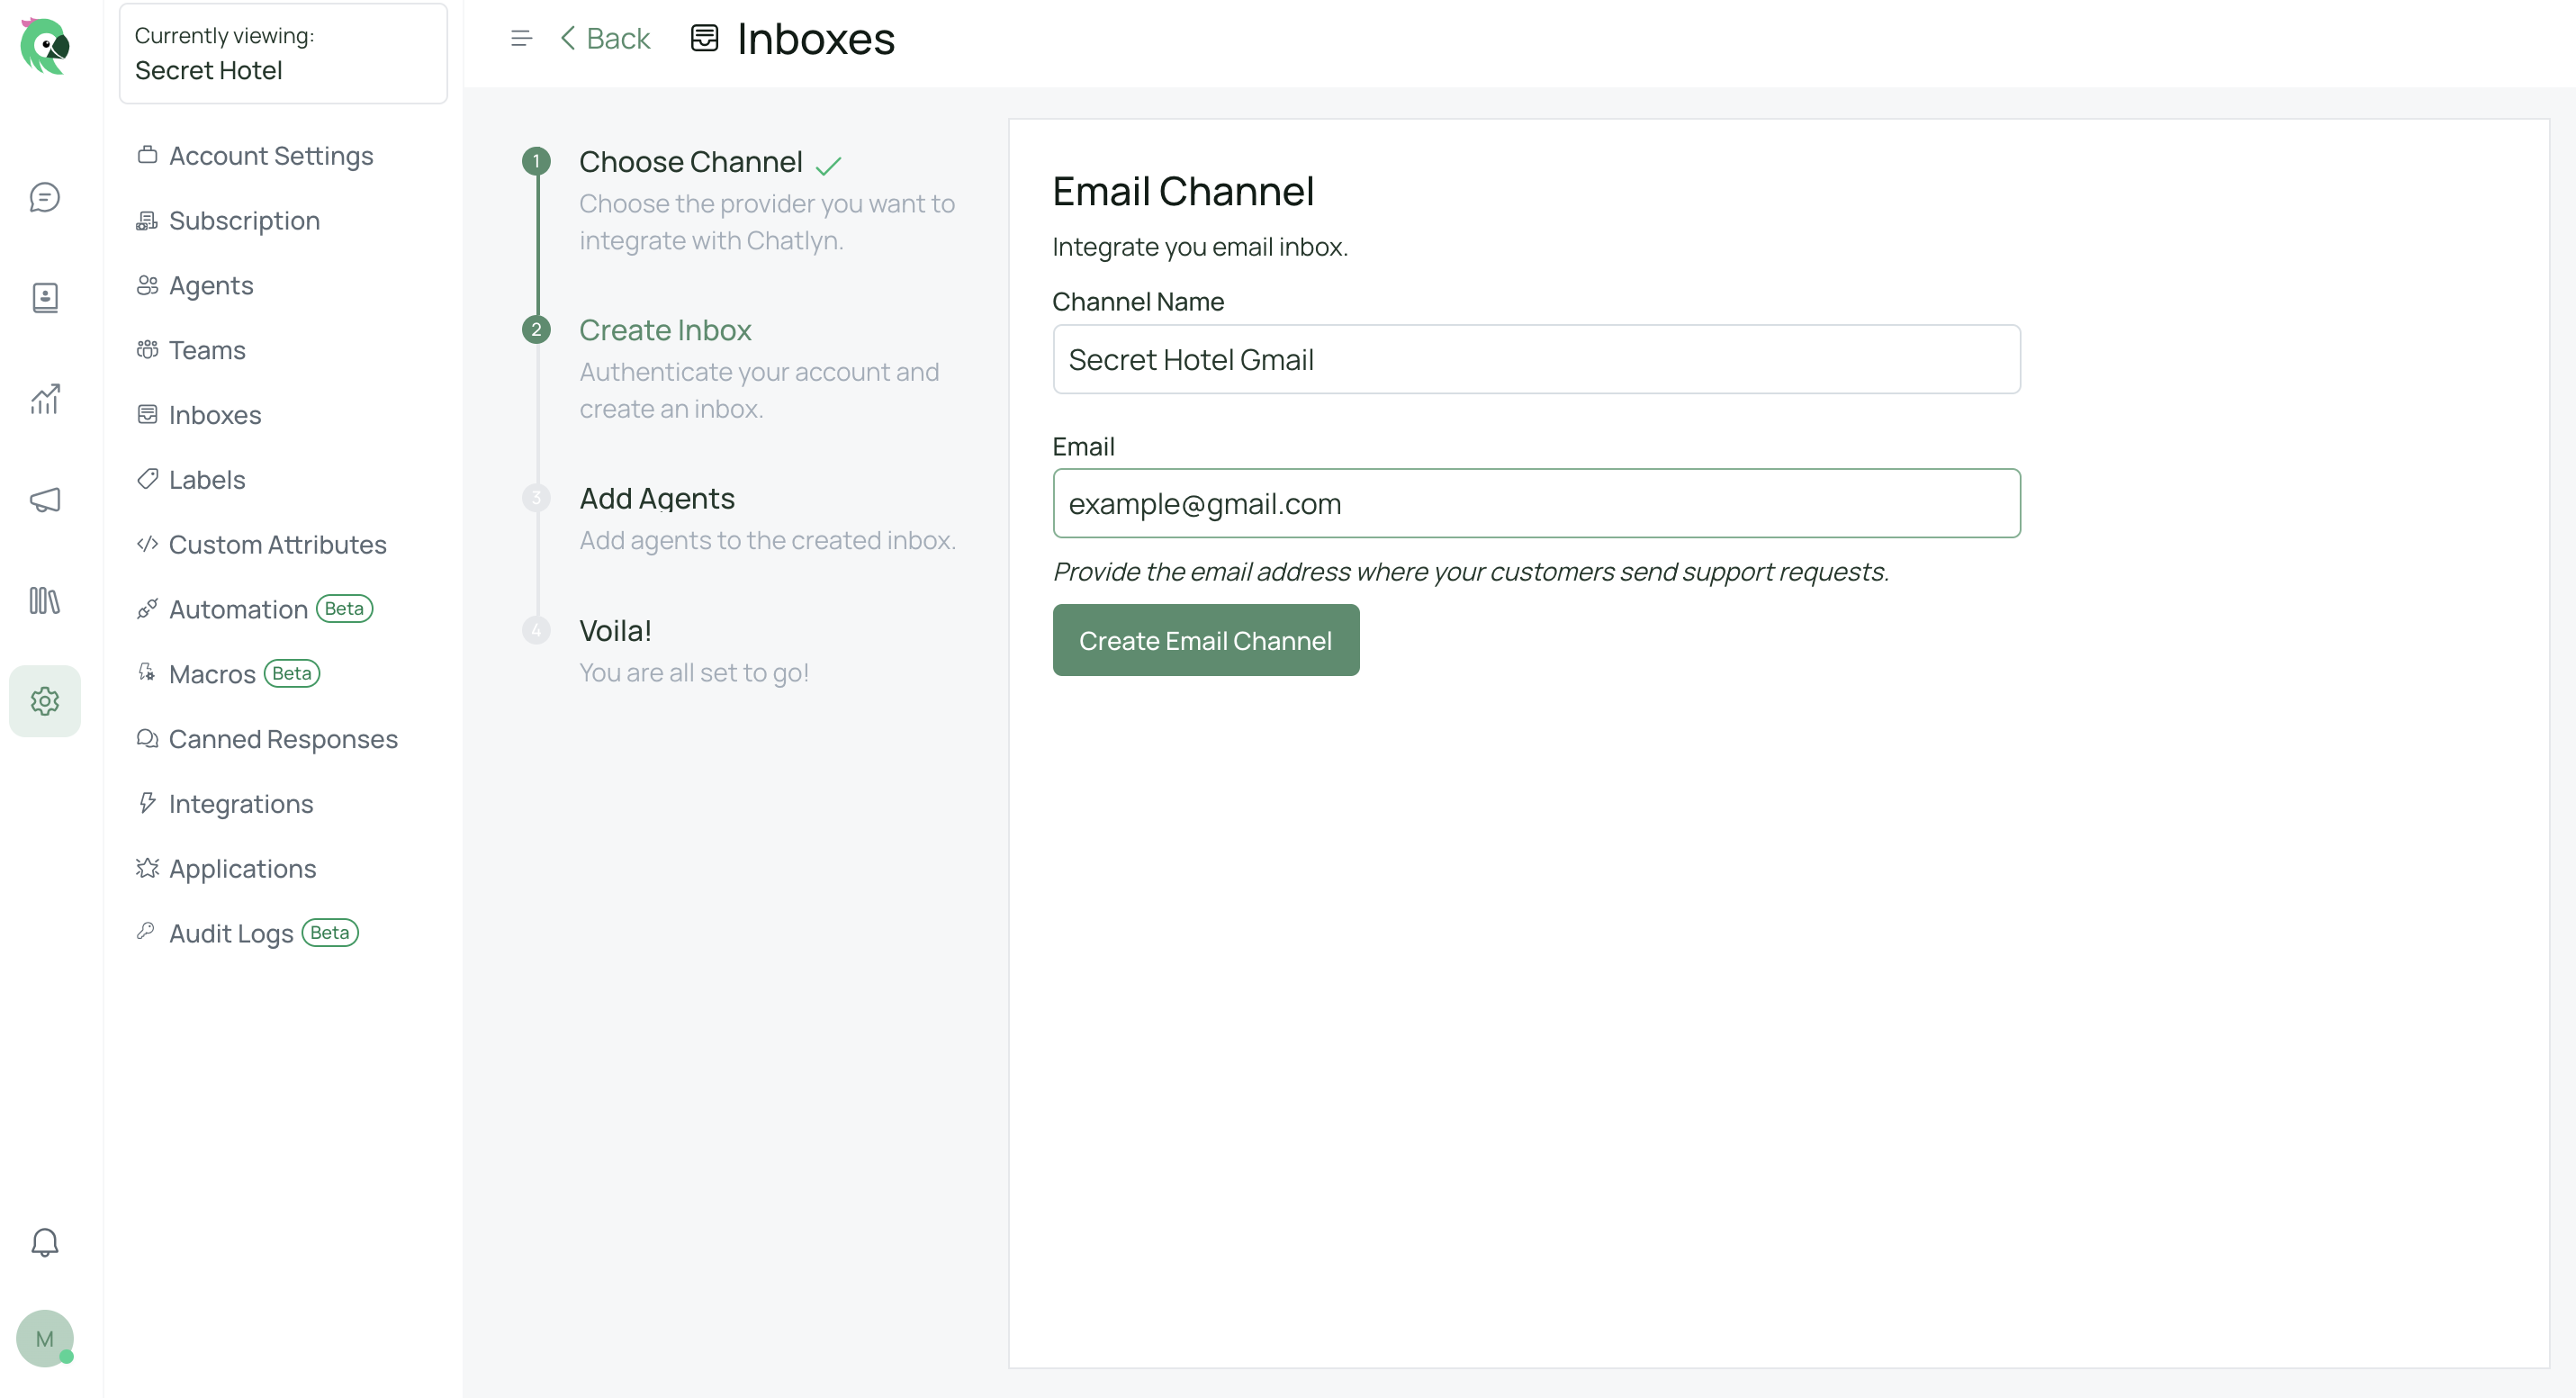
Provide a channel name that describes how you’d like to address the channel, enter your support email, and click on the “Create Email Channel” button.
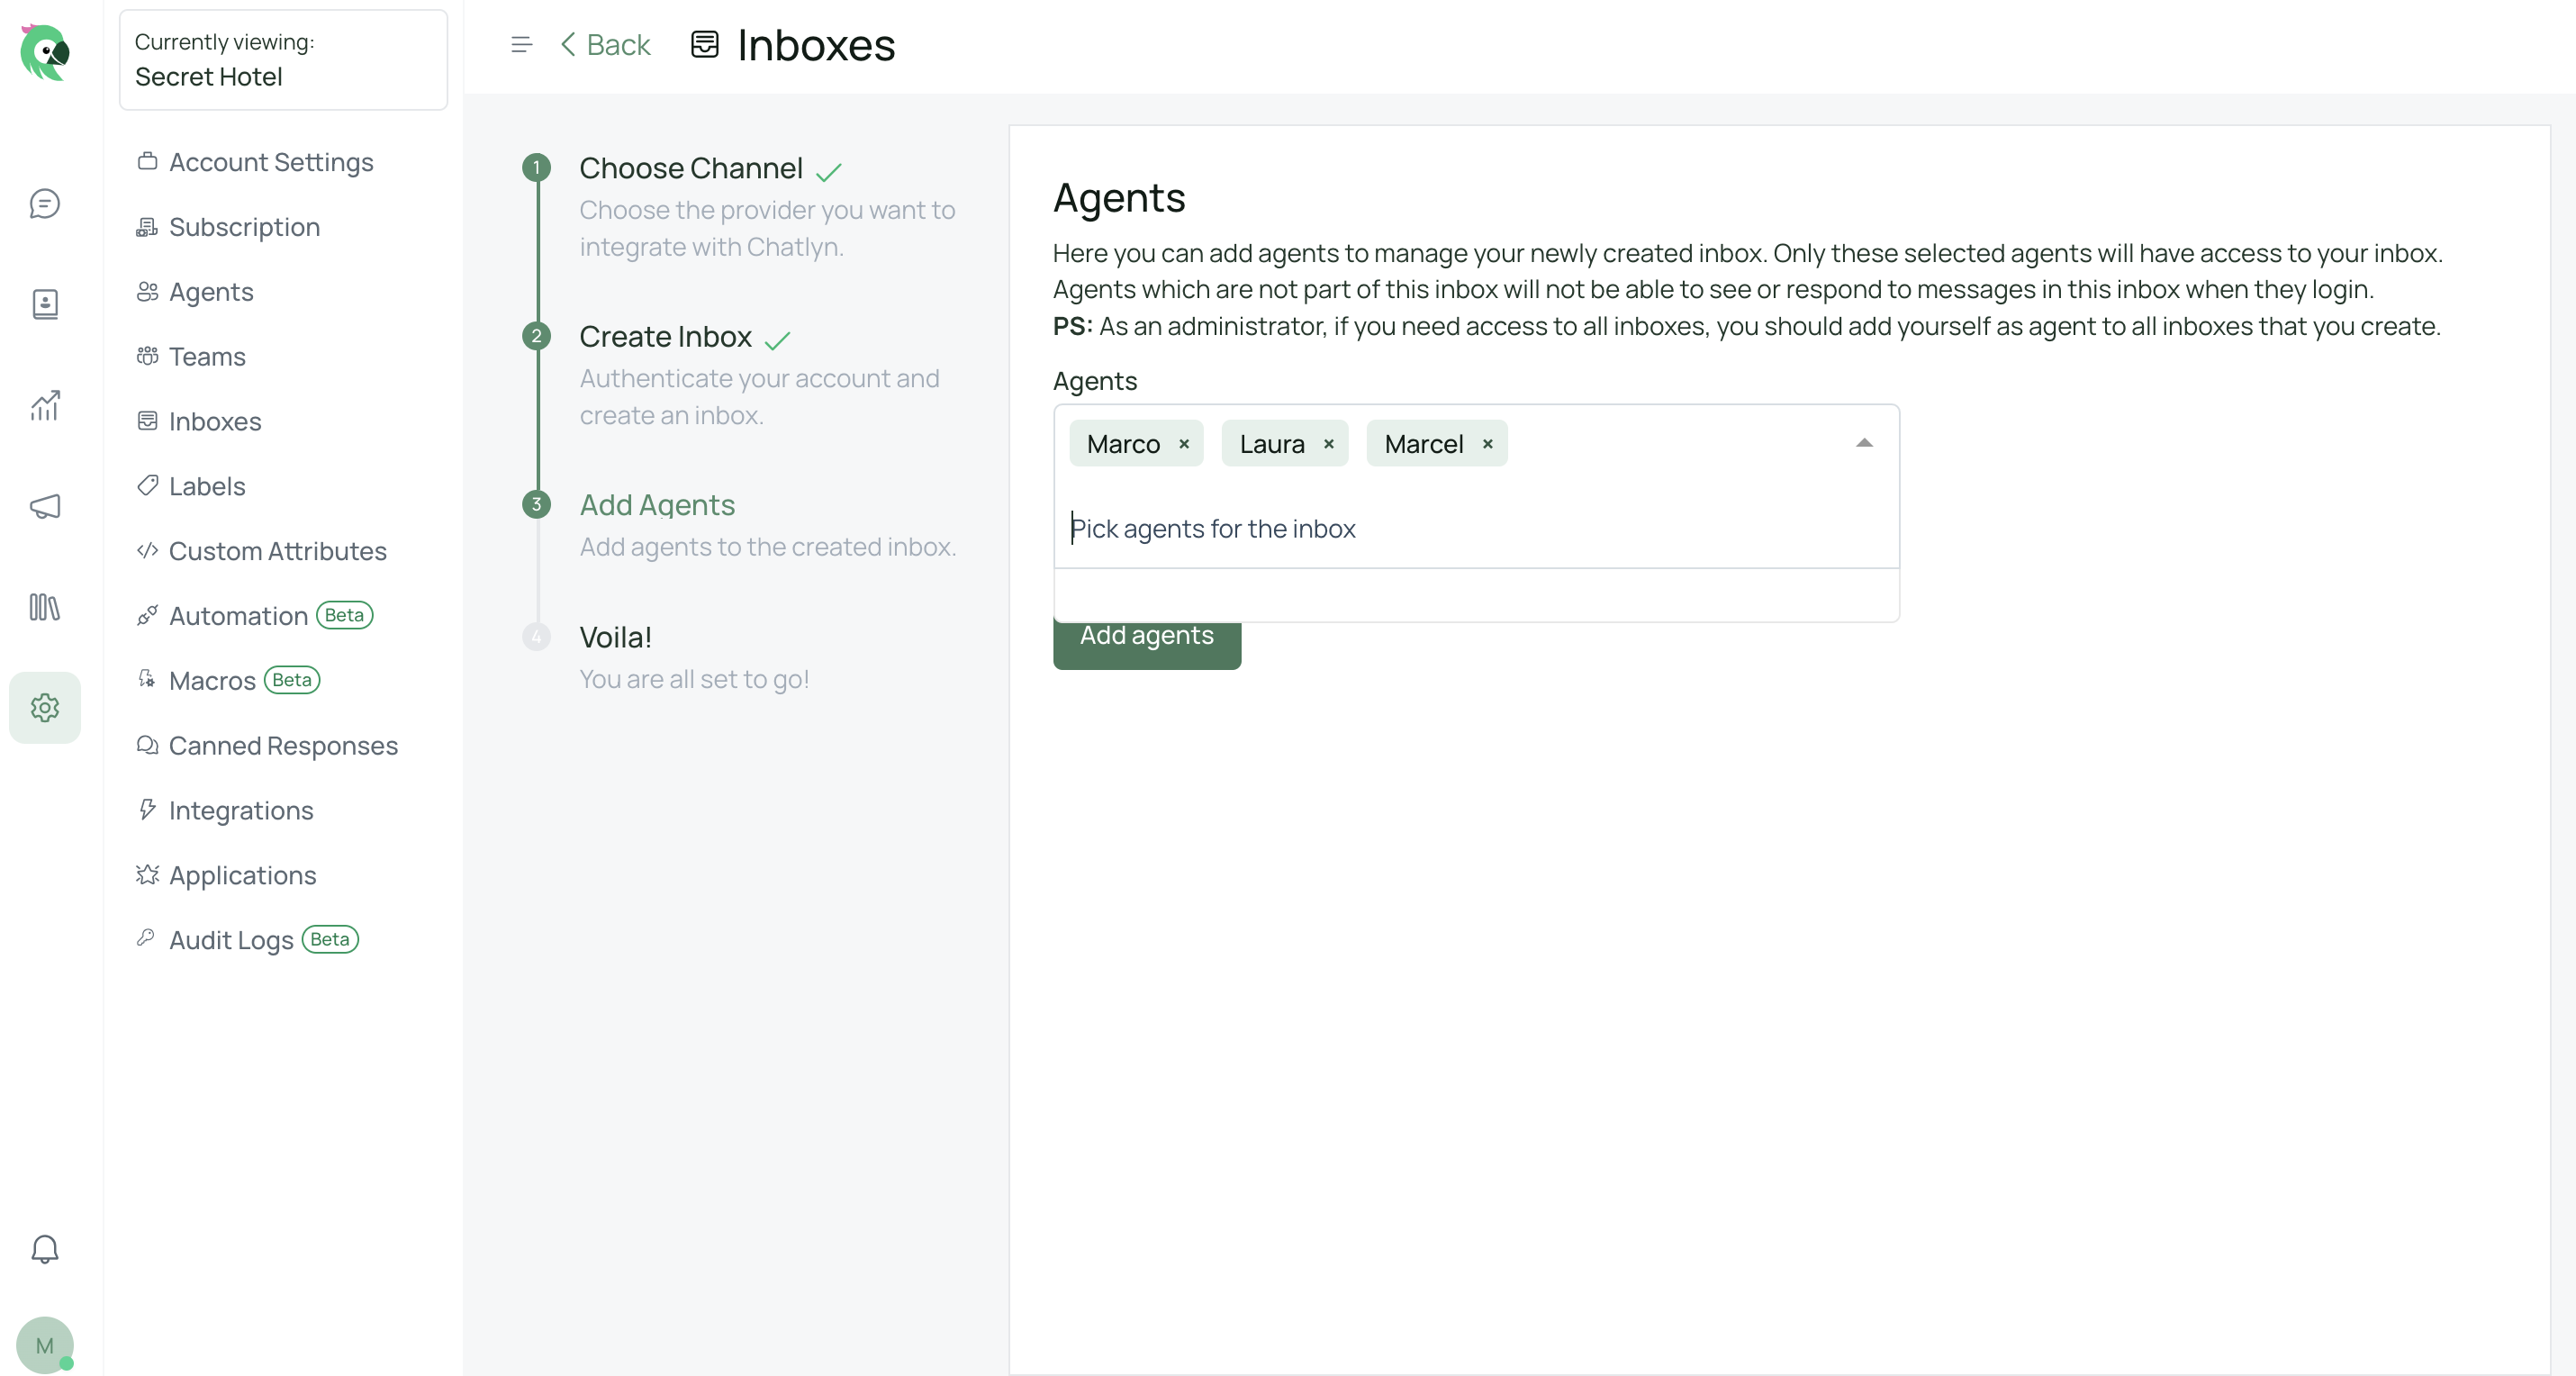
“Add agents” to your email inbox to enable them to receive and respond to email messages from customers.
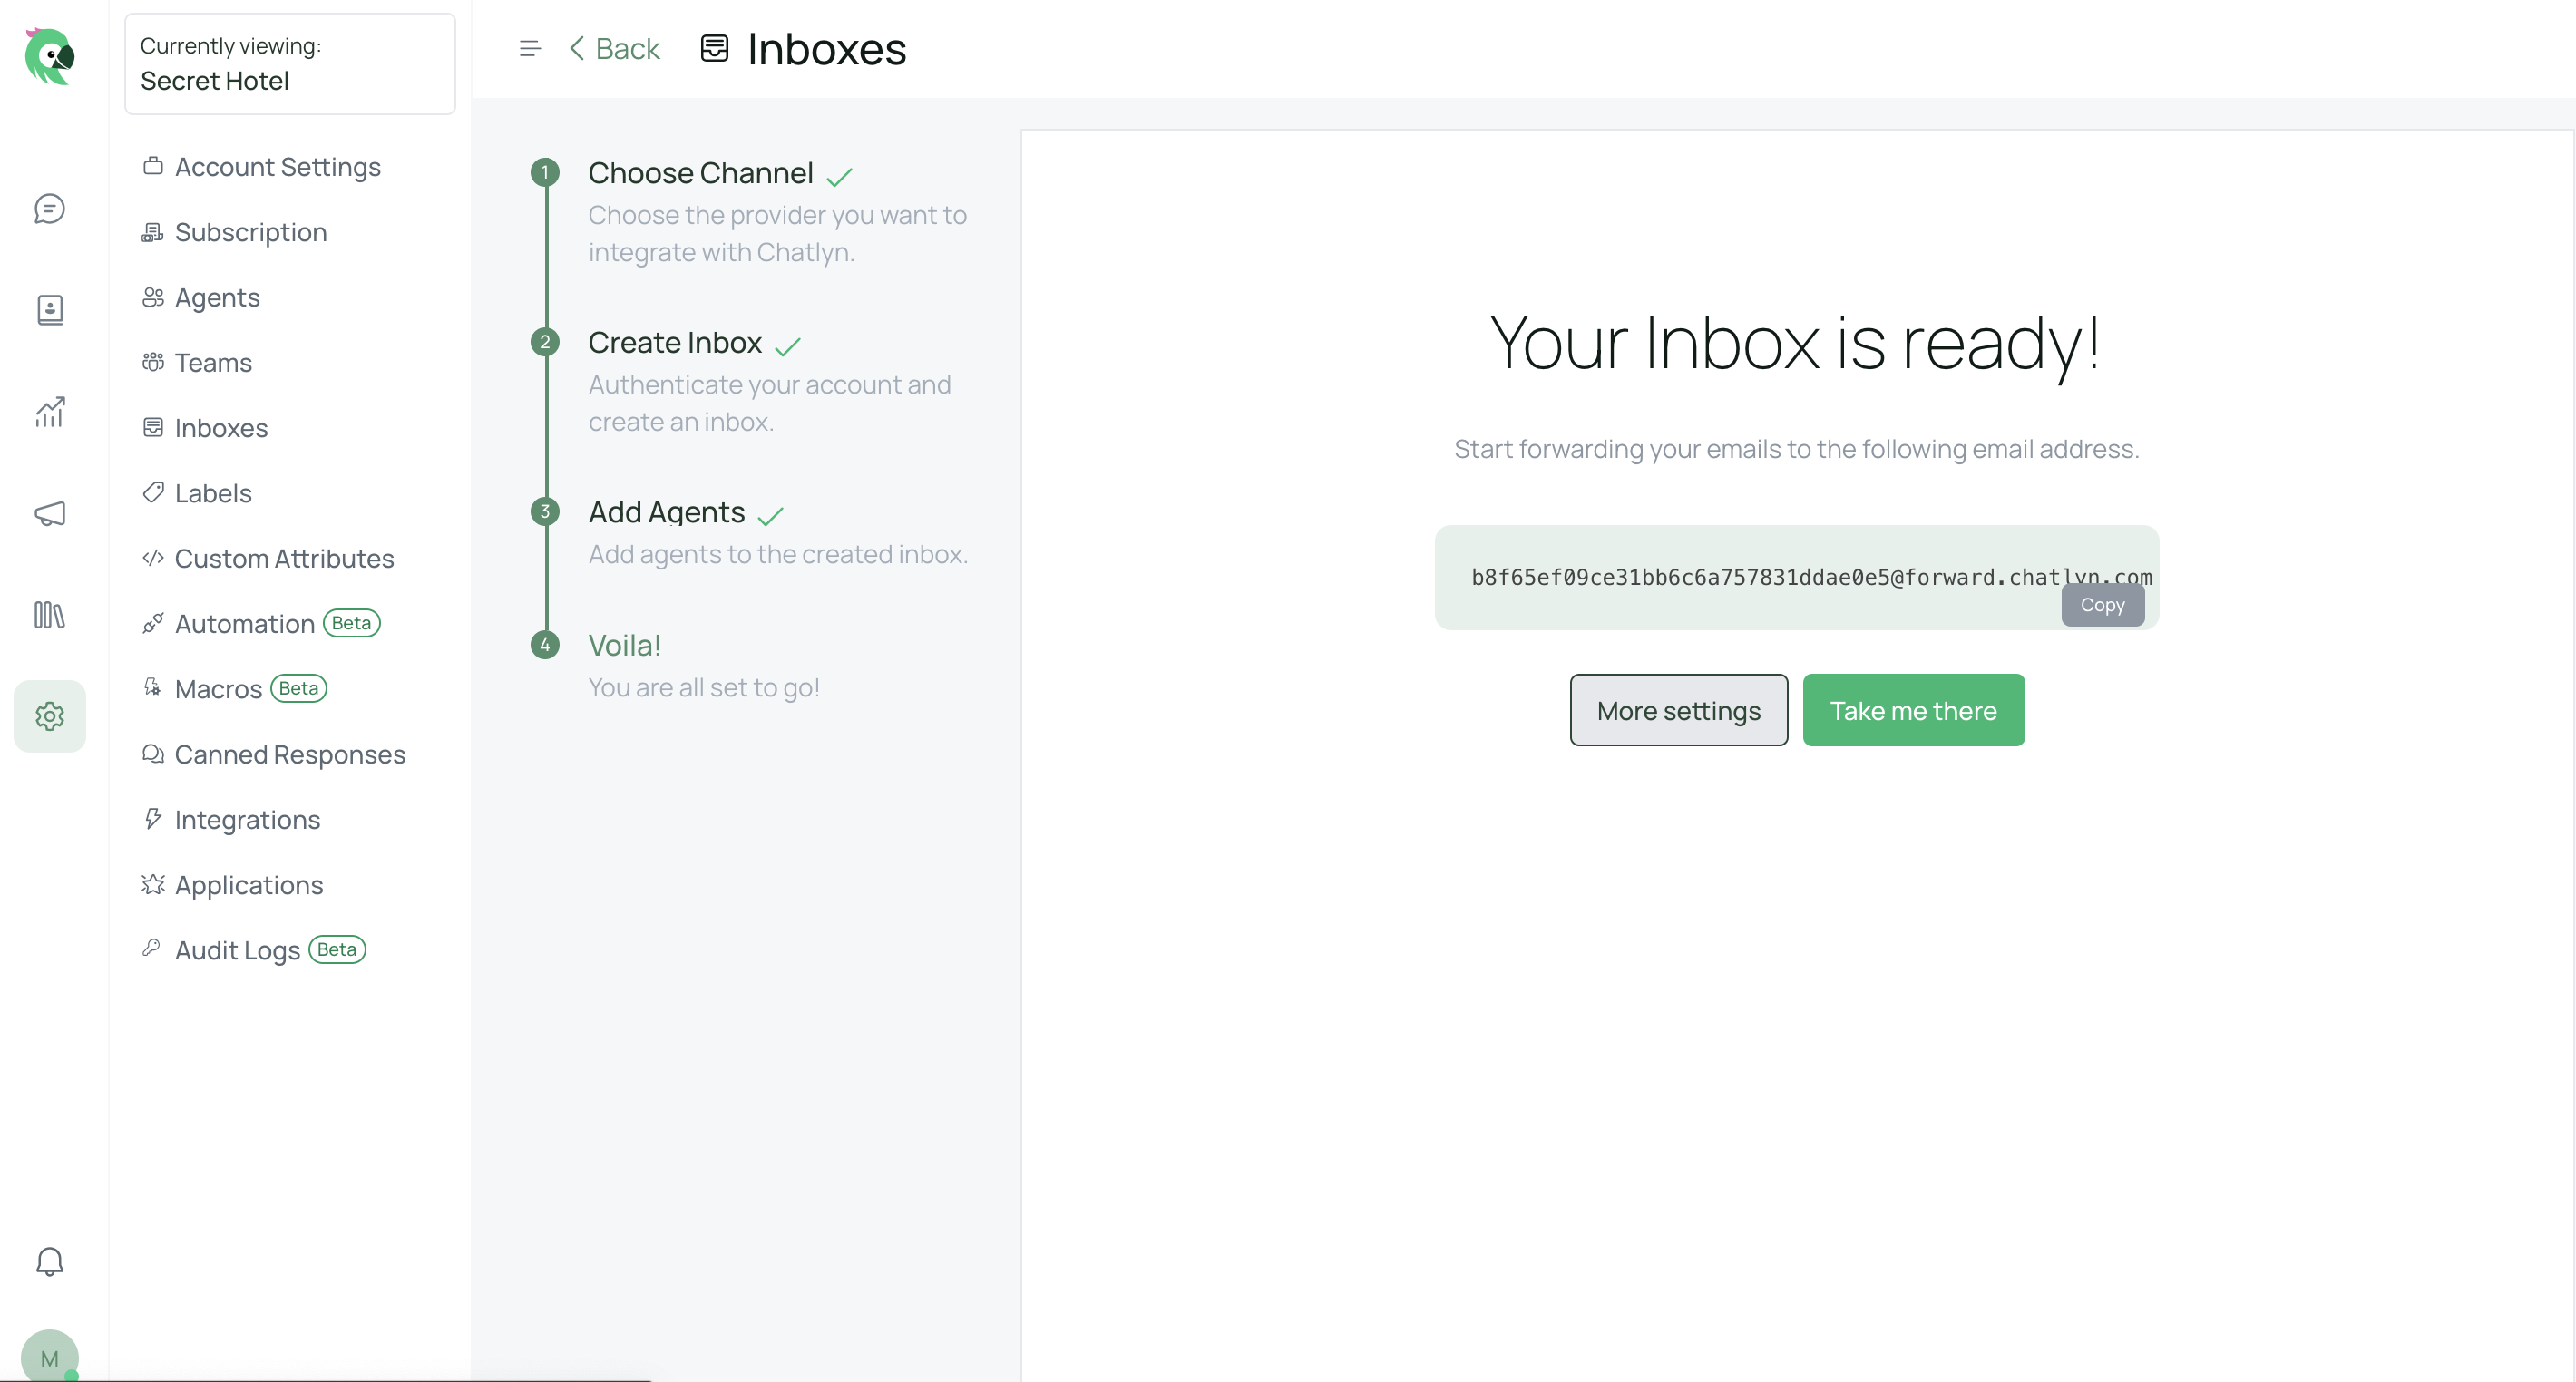
Congratulations! You have successfully created an Email inbox. Now, you can configure your email settings by navigating to Settings > Inboxes > Email Inbox settings > Configuration tab.
You can configure your email inbox in two ways: Forward to Email and Configure IMAP + SMTP. (IMAP is used to retrieve mails and SMTP for sending mails via chatlyn)
Forward to Email:
- Go to Settings → Inboxes → Email Inbox settings → Configuration tab.
- Copy forward email address.
- Configure the copied email address as the forwarding email address in the email inbox.
- Send a mail to the forwarding address added inbox.
- Check chatlyn email inbox for the new email.
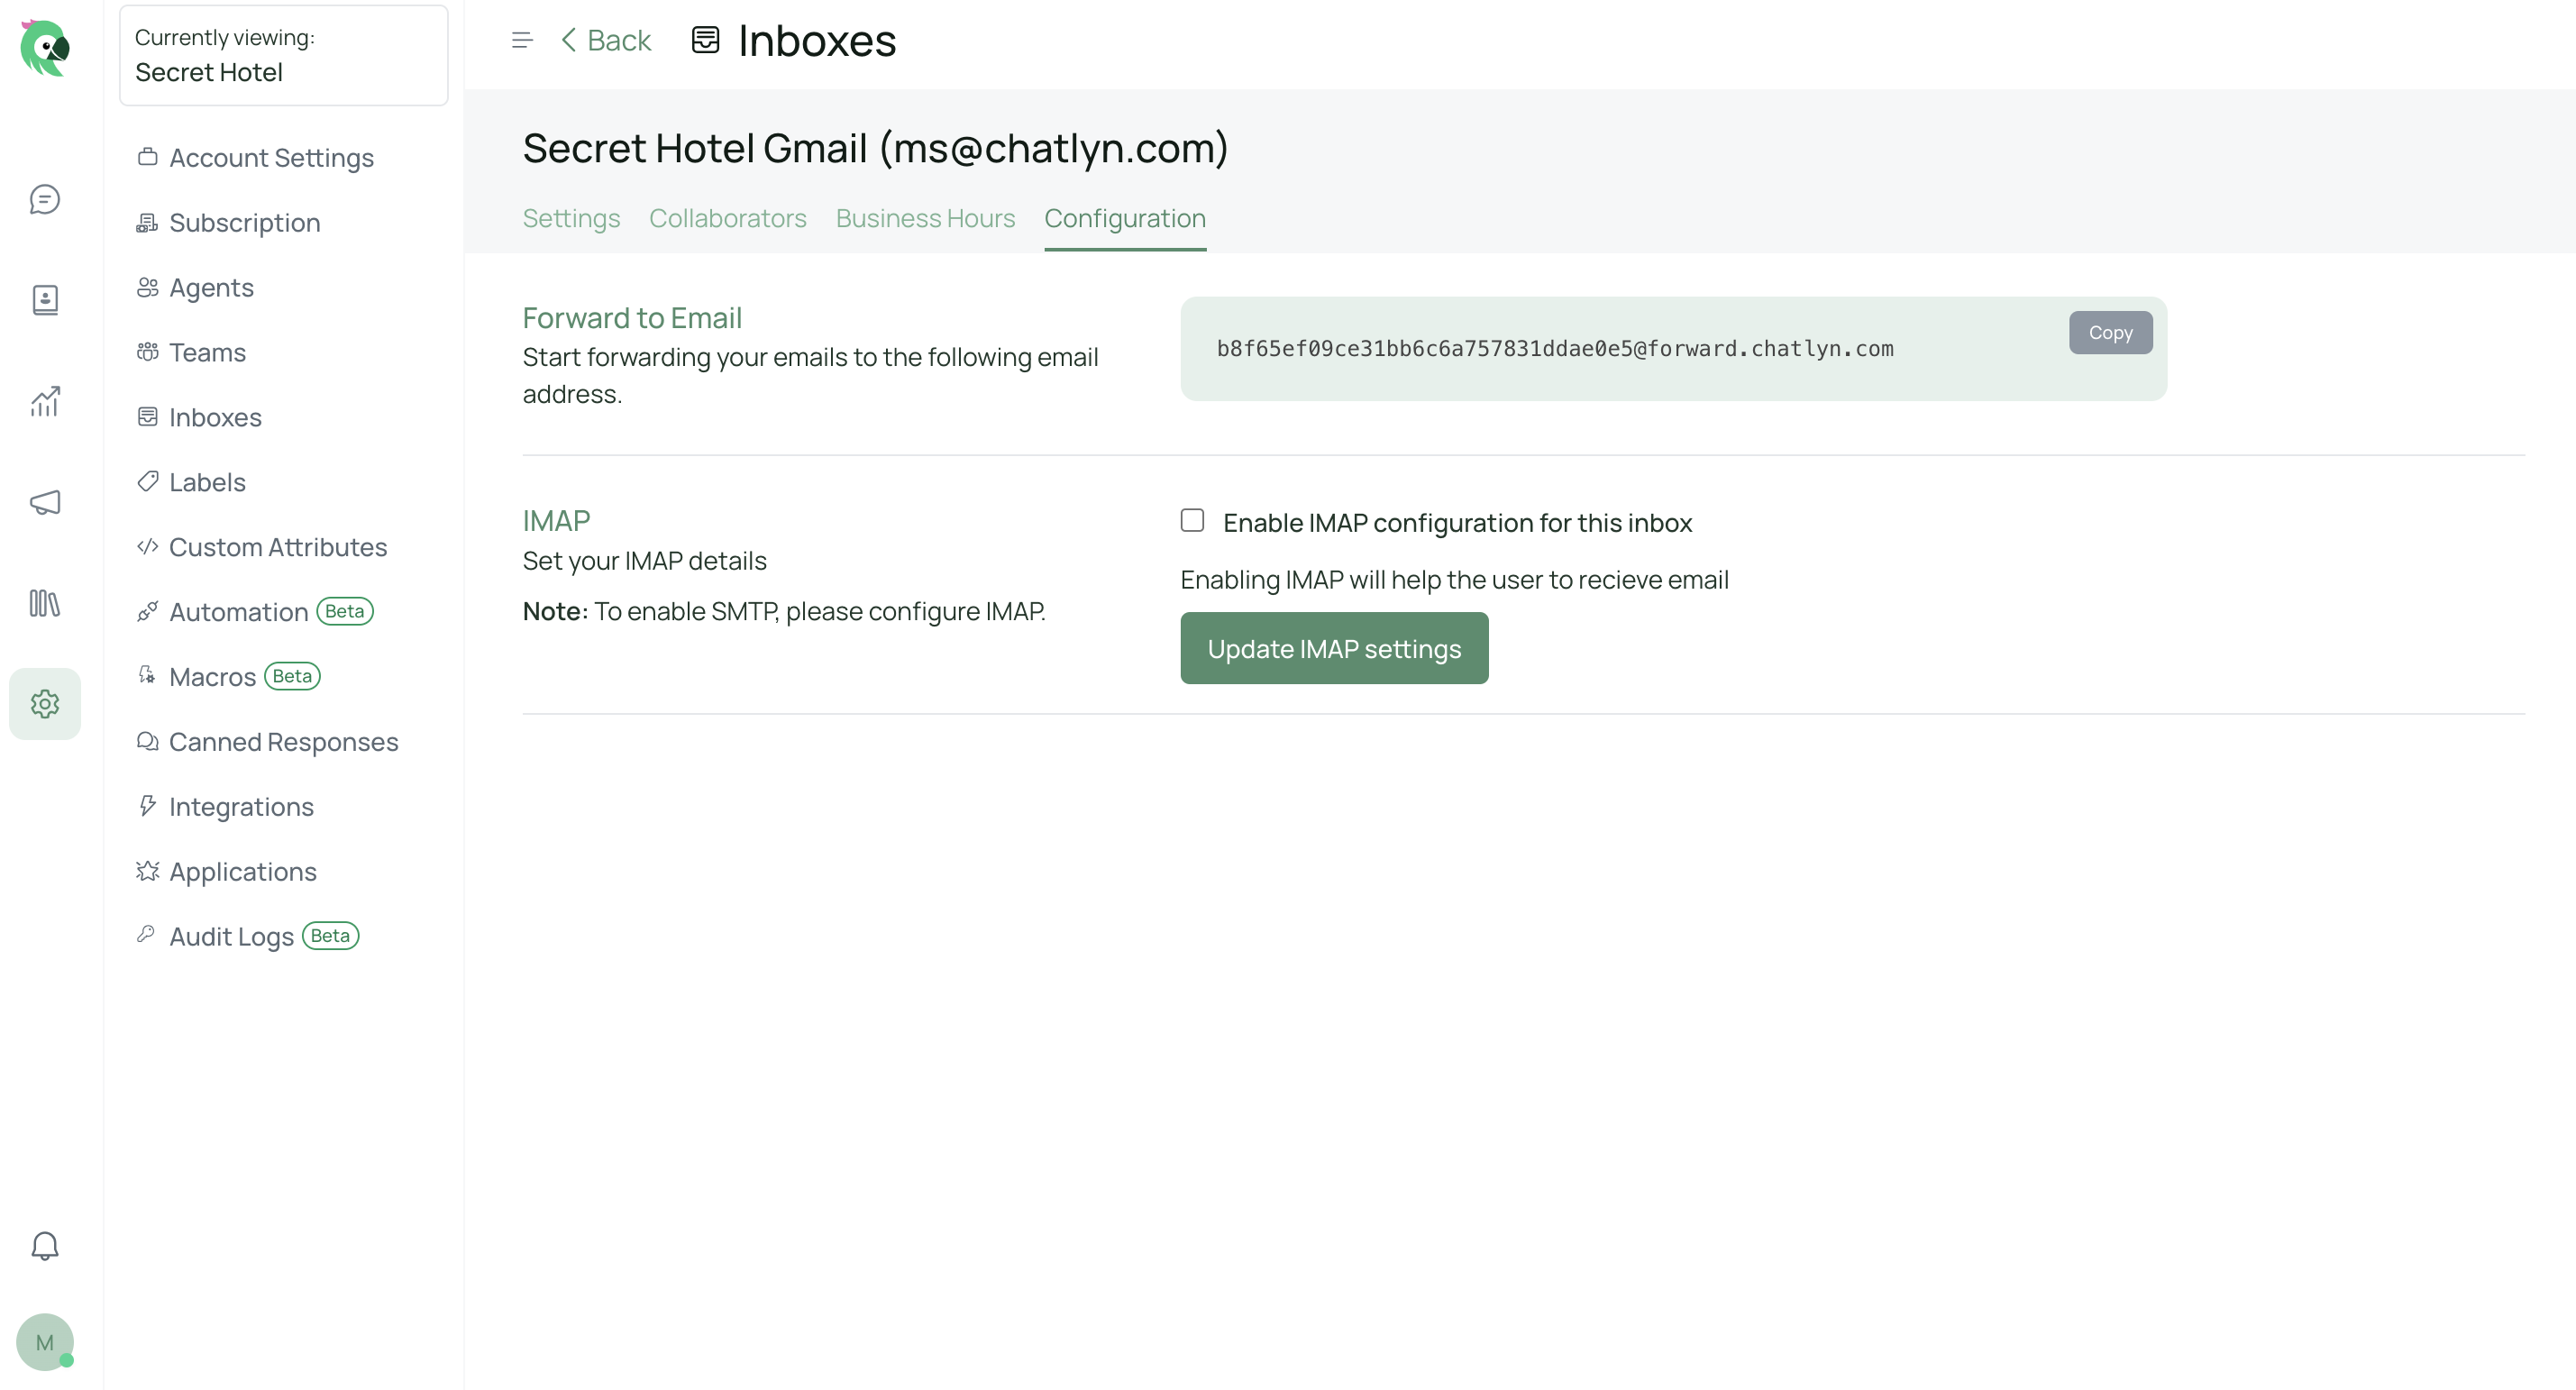
Configure IMAP:
- Go to Settings → Inboxes → Email Inbox settings → Configuration tab.
- Select the checkbox “Enable IMAP configuration for this inbox”. You’ll be able to see the required fields as follows:
- Address
- Port
- Password
- Test if everything is working fine.
- Send an email to the IMAP configured email in chatlyn.
- Check chatlyn inbox for the new email.
- Open the email conversation in chatlyn and verify the email details.

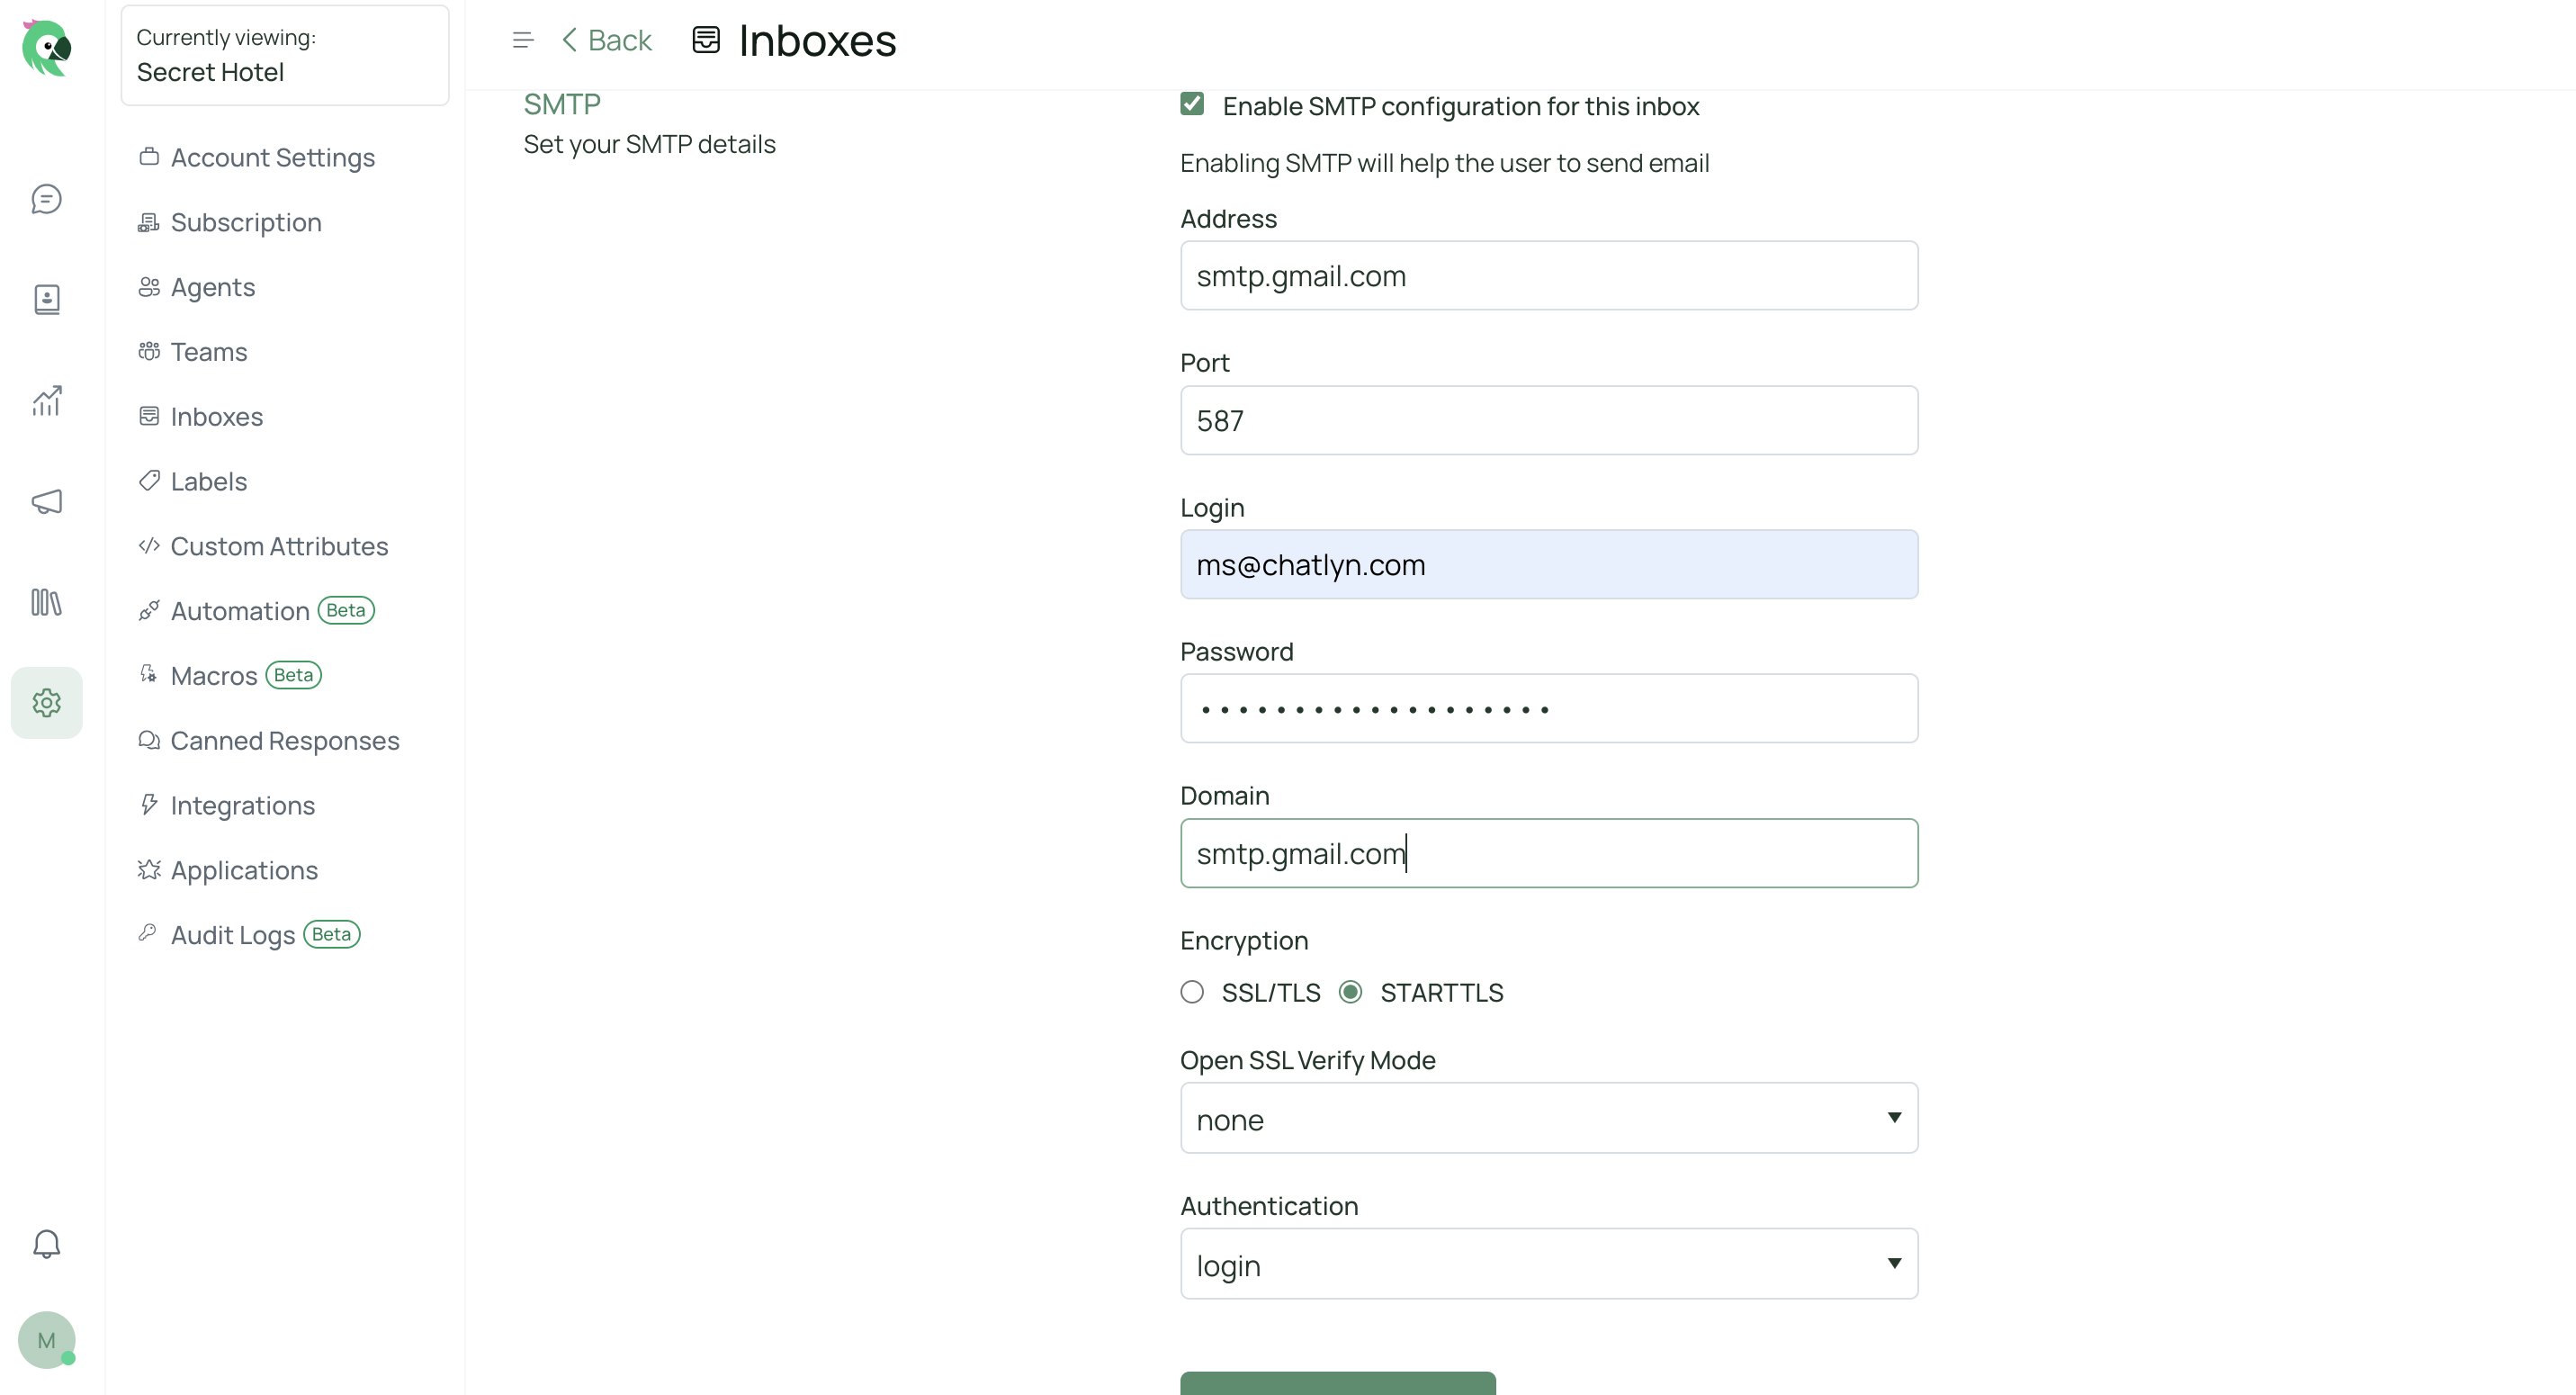
Configure SMTP:
- Go to Settings → Inboxes → Email Inbox settings → Configuration tab.
- To enable SMTP, select checkbox “Enable SMTP configuration for this inbox”
- Fill up below fields and click on “Update SMTP settings”.
- Address
- Port
- Password
- Domain
- Open an existing email Conversation in chatlyn.
- Type a reply message for the conversation and click on “Send” button.
- Verify that mail has been delivered.
- Check recipient inbox for the delivered email.