Steps
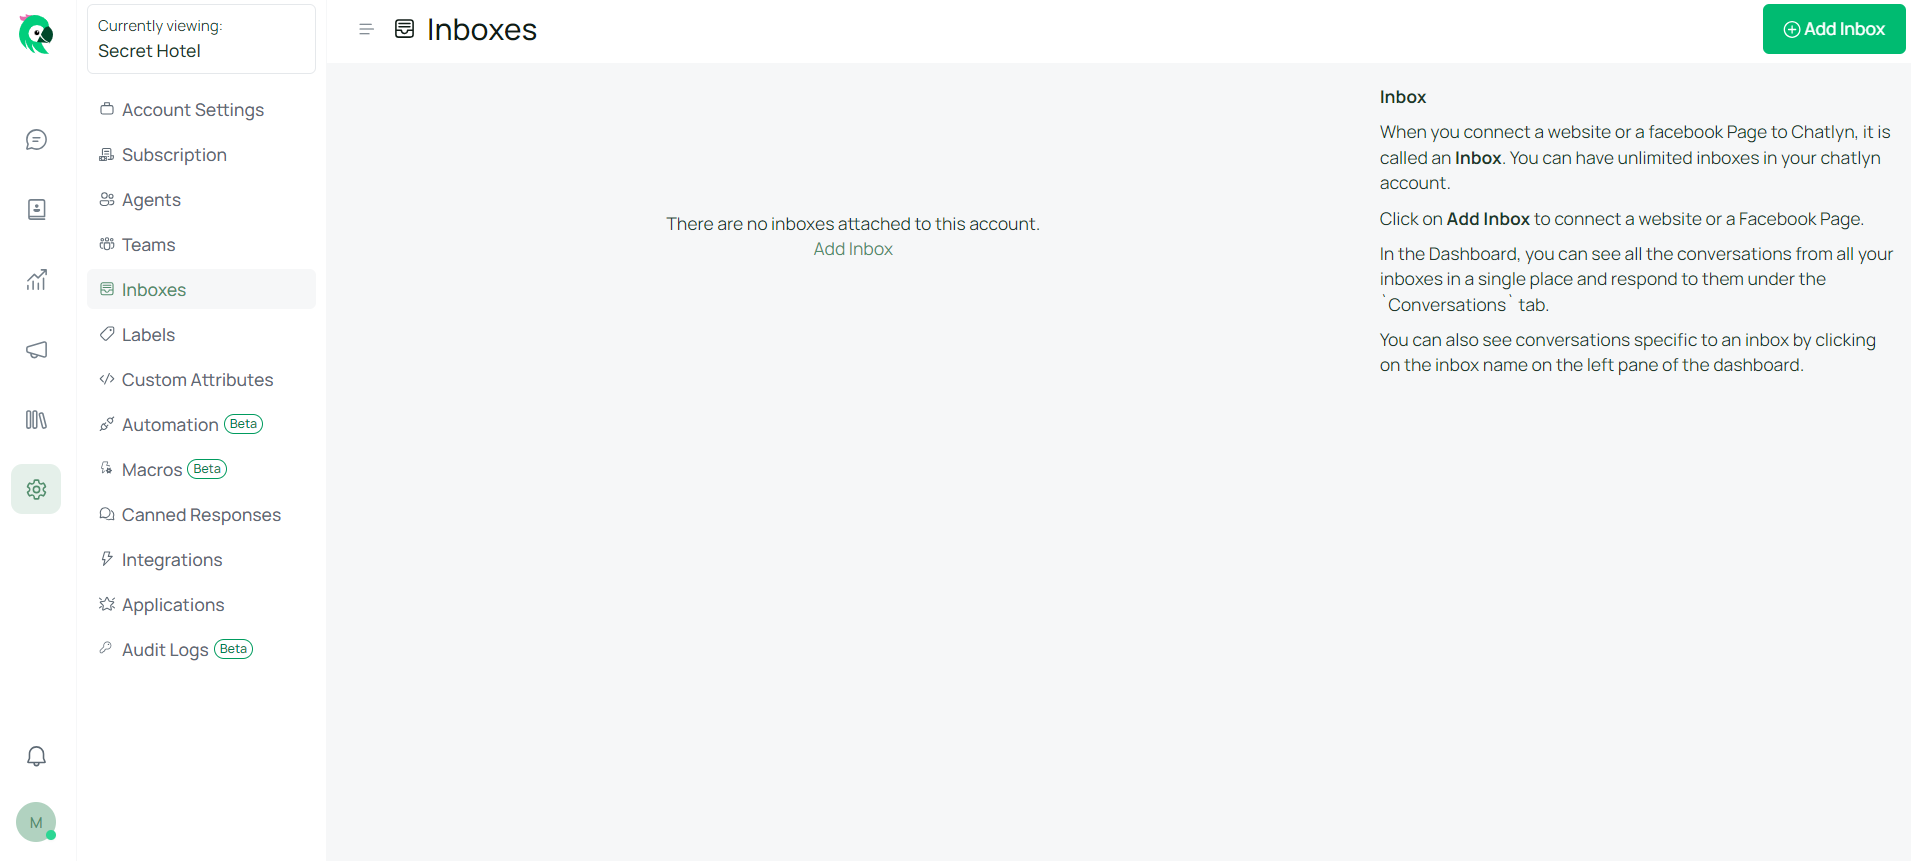
Navigate to Settings, then Inboxes, and select “Add Inbox.”
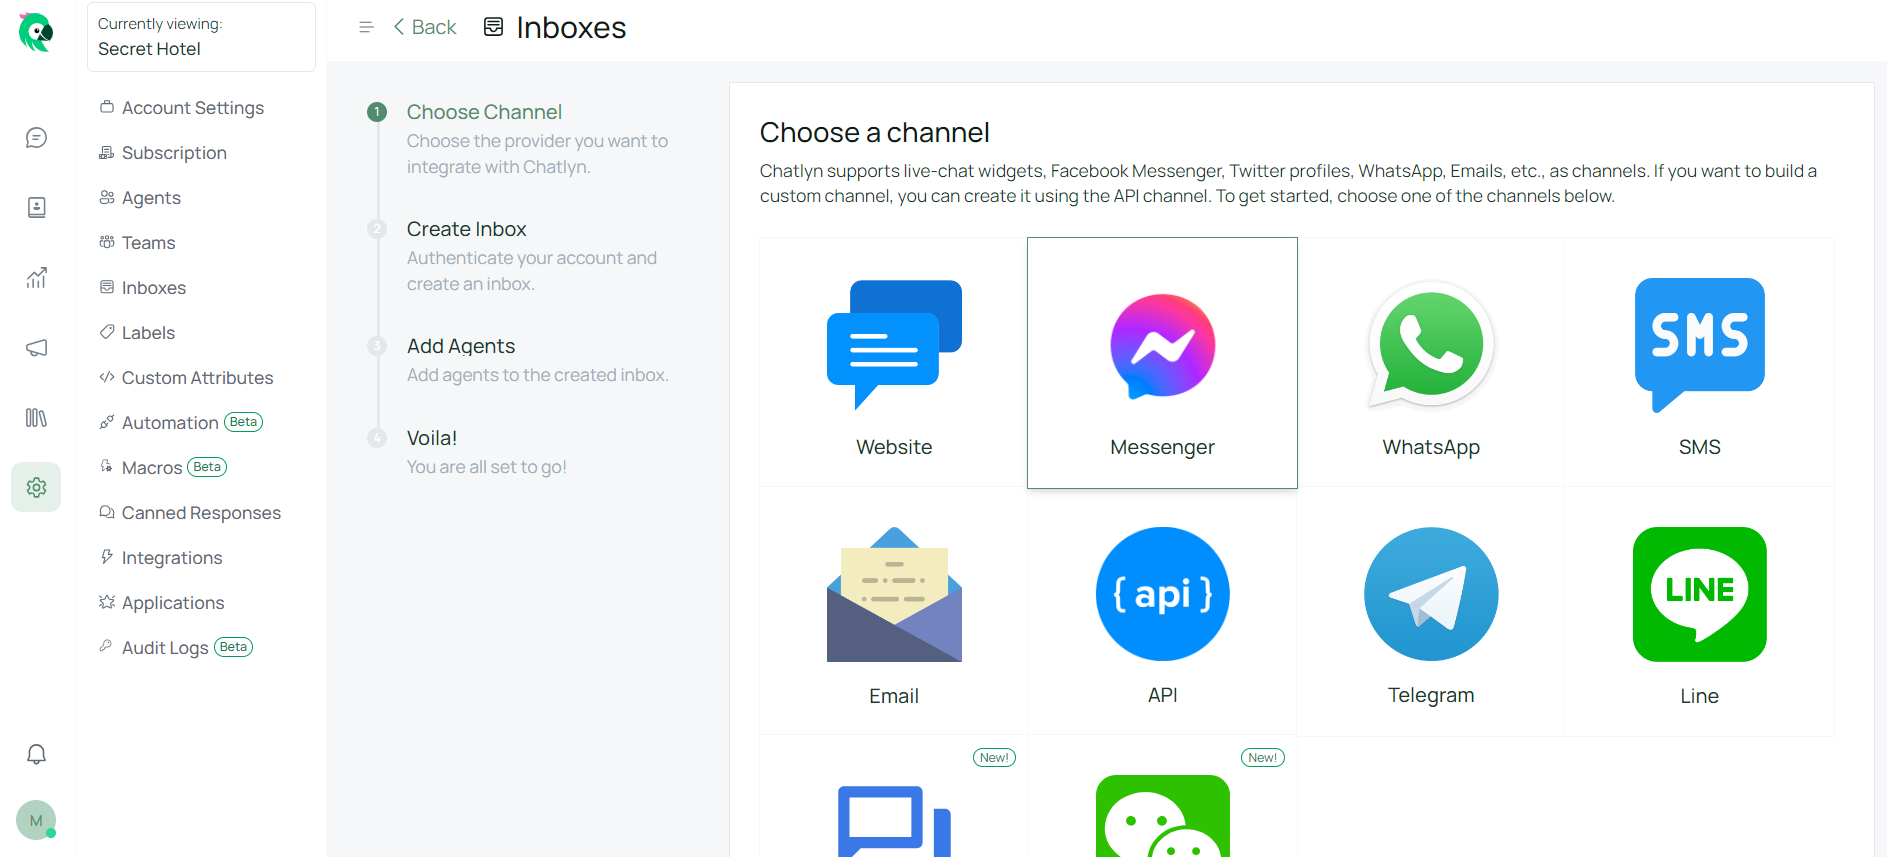
Click the Messenger icon.
Click the Facebook login button and log in to your Facebook account in the new window.
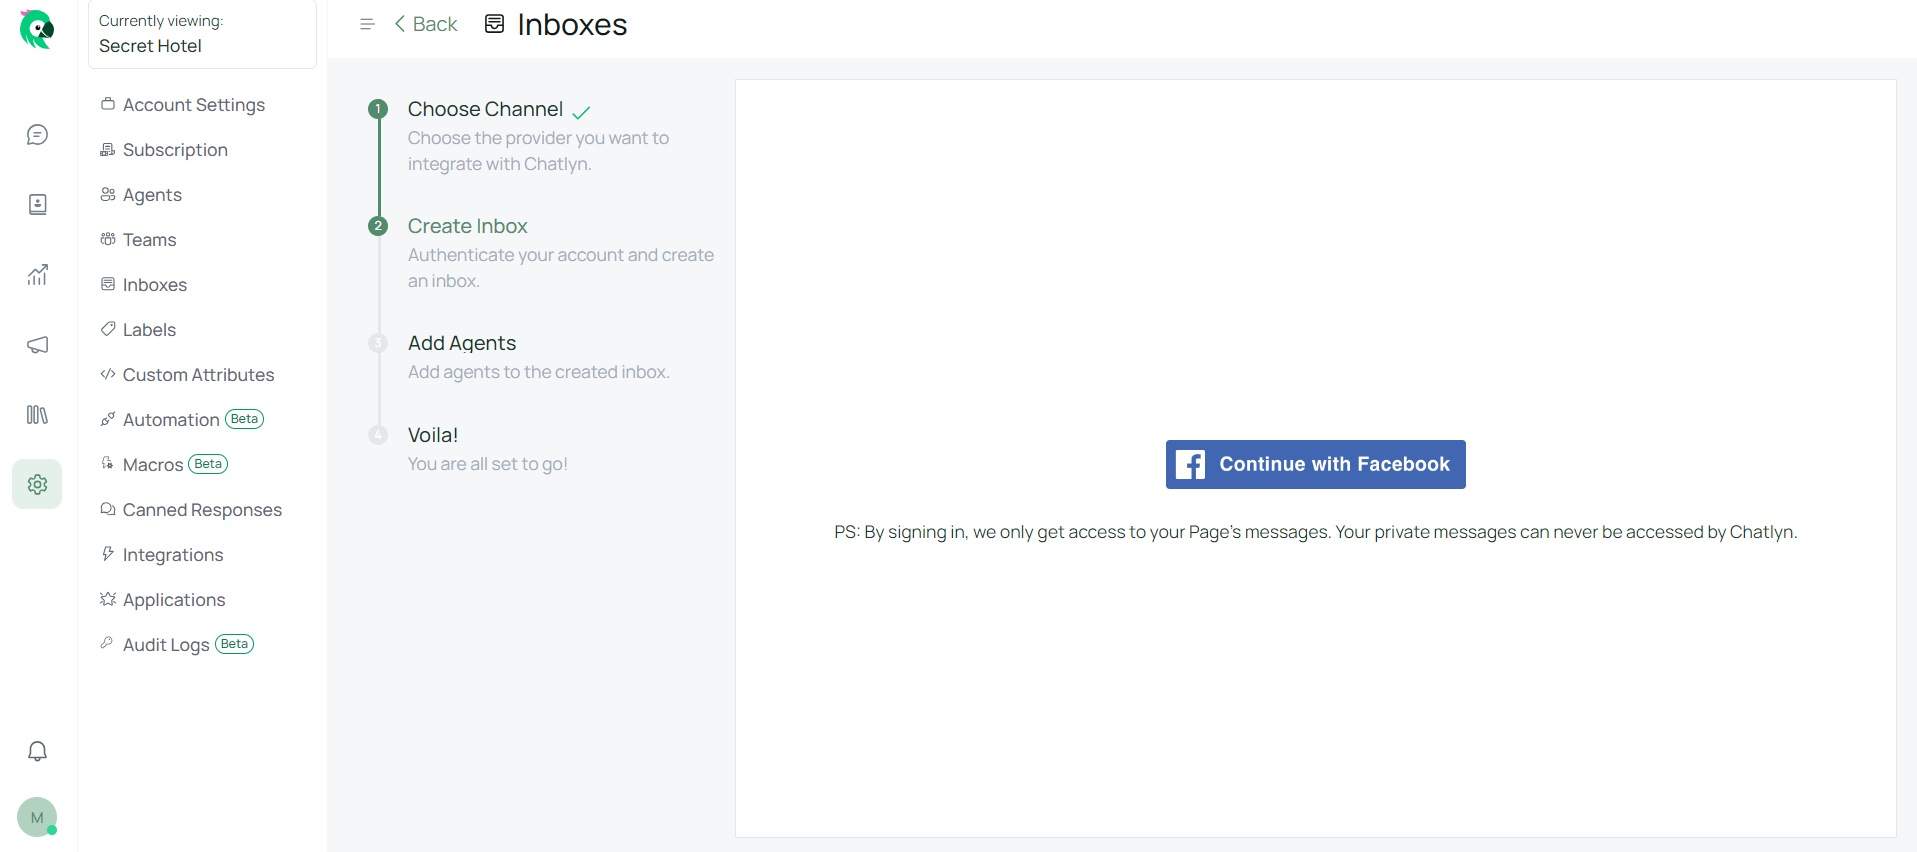
Authenticate with Facebook and select the page you want to connect, enabling all permissions necessary for chatlyn to function properly.
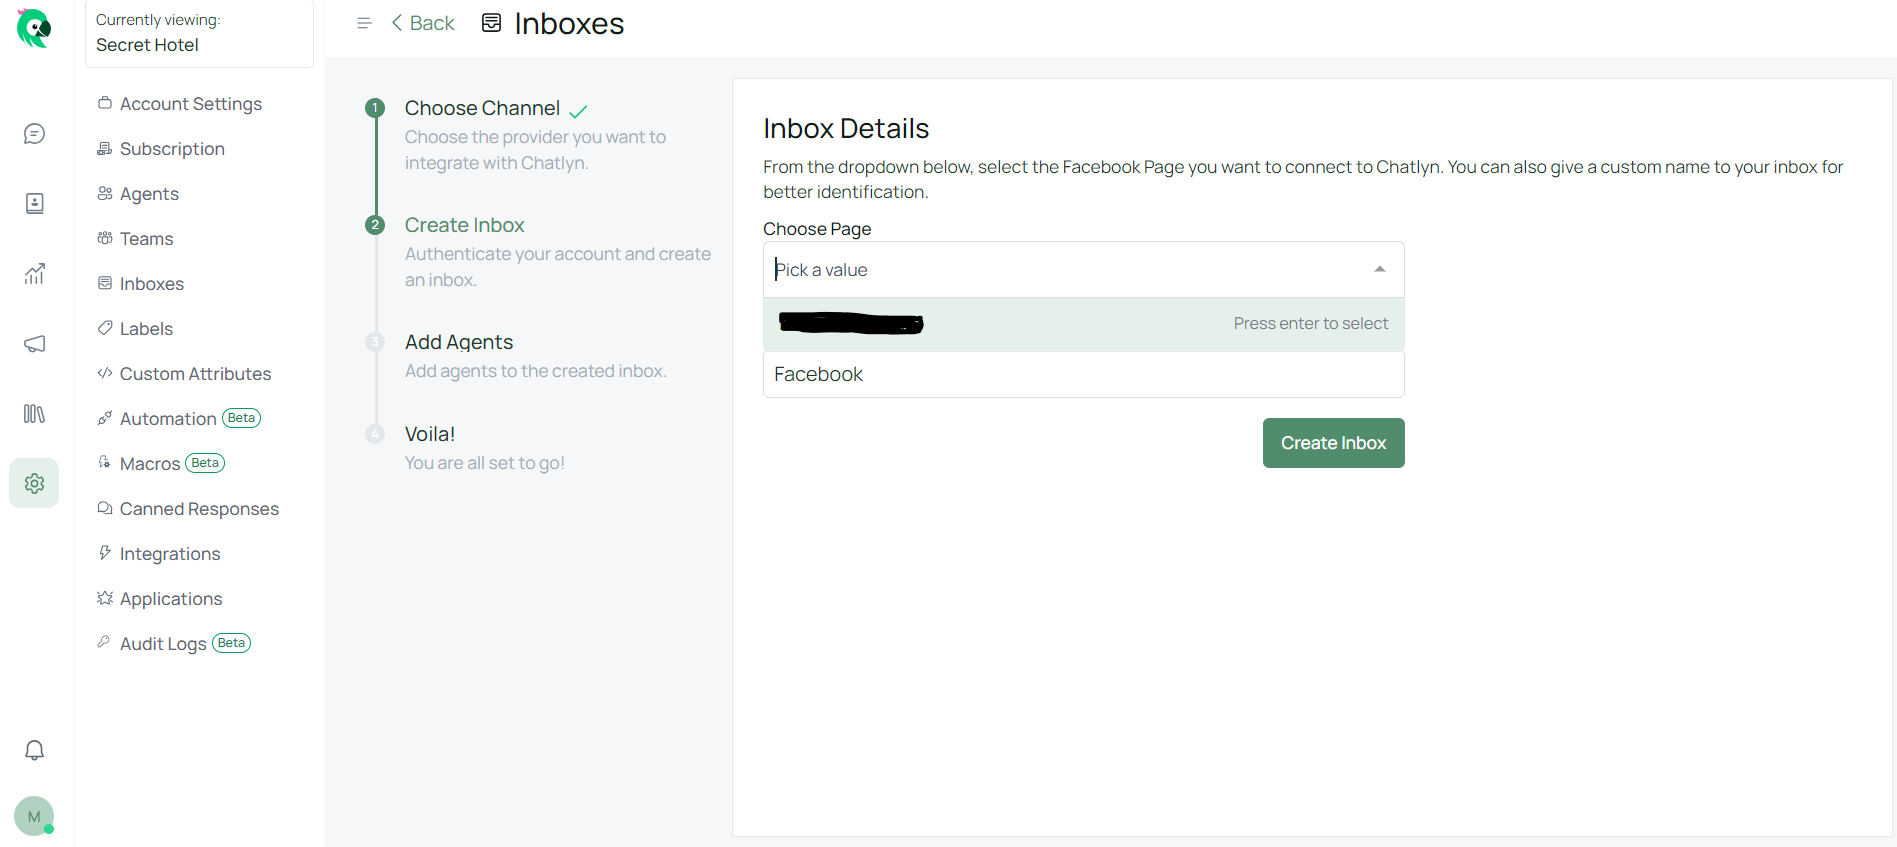
Choose your Facebook page from the dropdown menu in chatlyn.

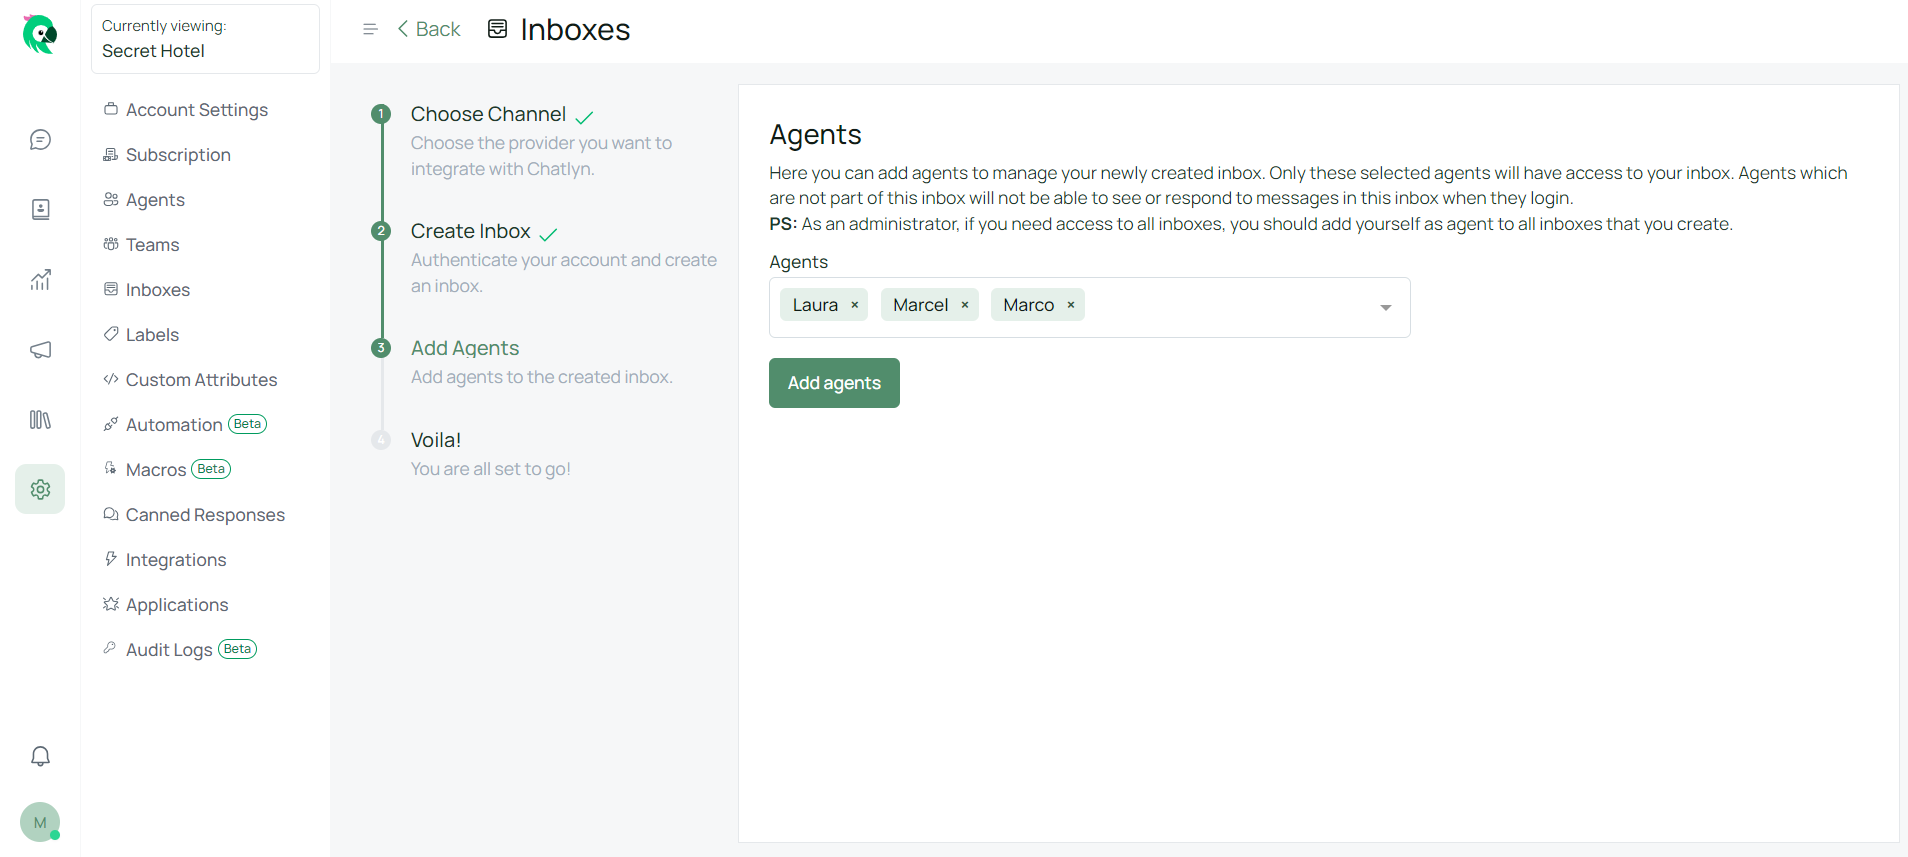
Add agents to your Facebook inbox.
Congratulations! You have successfully created a Facebook inbox in chatlyn. You will now be able to view and respond to messages sent to your Facebook page